Upgrading ASUS RT-AC66U to TomatoUSB
The popular TomatoUSB firmware now supports the ASUS RT-AC66U 1.75Gbps wireless router. The TomatoUSB (Shibby) firmware fully supports AC-mode (802.11ac) on 80MHz channel width.
Some features of TomatoUSB firmware:
- Very advanced QoS (Quality of Service) configuration
- Advanced wireless configurations (WDS, wireless client modes, etc)
- Graphical bandwidth usage monitor
- Printer server: access USB printer from LAN
- Media server DLNA
- Built-in support for USB – 3G, Storage
If you are looking for an easy to follow ASUS RT-AC66U TomatoUSB firmware flashing guide, this guide is for you.
Warning: Flashing third party firmware will void your warranty. I will not be held responsible for anything that goes wrong.
Summary of the firmware flashing steps
In the next few sections, we are going to:
- Download and install the ASUS RT-AC66U Firmware Restoration Utility.
- Download the latest TomatoUSB (Shibby) firmware for the ASUS RT-AC66U.
- Connect up the RT-AC66U to the computer.
- Flash the TomatoUSB (Shibby) firmware using the Firmware Restoration Utility.
Required equipments
You will need the following:
- ASUS RT-AC66U Wireless Router
- An ethernet patch cord (CAT5E cable)
- Pen (or other pointed object) to push the reset button
- Computer to flash the TomatoUSB firmware
Required files
You will need the following two files:
- ASUS RT-AC66U Firmware Restoration Utility
- TomatoUSB (Shibby) firmware
Downloading and installing the ASUS RT-AC66U Firmware Restoration Utility
- Using the web browser, navigate to http://support.asus.com/ServiceHome.aspx?SLanguage=en
- Using the search feature (“Search By”), search for “RT-AC66U” without the quotes
You should be presented with the search results. - On the search results page, click on the “Download” to navigate to the download section for RT-AC66U
- In the OS drop down selection box, choose the Operating System (OS) you are on (e.g. Windows 7 64-bit).
The page should refresh and shows the list of files available for your operating system. - Click on the plus (+) beside Utilities to expand the list of available downloads.
The Utilities link should expand to show a list of files available for download. - Locate the “ASUS RT-AC66U Firmware Restoration” and download it.
- Proceed to install the ASUS RT-AC66U Firmware Restoration Utility by launching the downloaded utility. Follow the on-screen instructions to install the ASUS RT-AC66U Firmware Restoration Utility.
Downloading the latest TomatoUSB (Shibby) firmware for RT-AC66U
- Using the web browser, navigate to http://tomato.groov.pl/download/K26RT-AC/
- Locate the latest build (e.g. 102-EN is newer than 100-EN).
- Navigate into the folder containing the latest build.
- Download the firmware (file ending with .trx). If you are not sure which to download, download the one with “AIO” in the filename.
Currently, you should have the ASUS RT-AC66U Firmware Restoration Utility installed (on your computer) and have downloaded the latest TomatoUSB (Shibby) firmware. Lets proceed to the next section.
Connecting the ASUS RT-AC66U to the computer
- Power off the ASUS RT-AC66U.
- Connect the computer (with the Firmware Restoration Utility and TomatoUSB firmware) to LAN port 1 of the ASUS RT-AC66U.
- Ensure the computer is configured to use DHCP.
Flashing the ASUS RT-AC66U with TomatoUSB (Shibby)
Starting the ASUS RT-AC66U in emergency firmware restore mode
- Power off the ASUS RT-AC66U.
- Press and hold on to the reset button.
- While holding down the reset button, power on the ASUS RT-AC66U
- Keep holding the reset button until the power led starts to blink / flash (on and off). When the power led starts flashing / blinking, release the reset button.
Flashing the TomatoUSB firmware using the firmware restoration utility
- Launch the ASUS RT-AC66U Firmware Restoration Utility on your computer.
- In the Firmware Restoration Utility, browse for the TomatoUSB (Shibby) firmware that you have downloaded earlier.
- Start the firmware flashing process.
If a prompt appears stating that it is a incompatible firmware, acknowledge and proceed with the flash. The utility should start scanning for the RT-AC66U. - Allow the firmware flashing to complete.
- Reboot / Power cycle the ASUS RT-AC66U wireless router when prompted.
Clearing the NVRAM
- After the router has completed booting up (stable led lights for wireless), power off the RT-AC66U.
- While holding the WPS button, turn on the RT-AC66U.
- Keep holding on to the WPS button for at least 30 seconds before releasing it
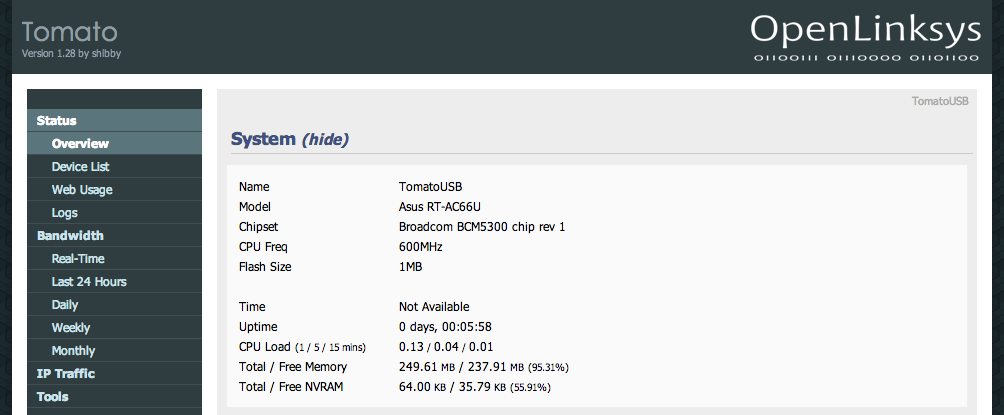
The router should reboot once you release the WPS button. - After the router has completed booting up, navigate to the TomatoUSB web admin (http://192.168.1.1) using the default credentials (user: root, password: admin).
Enabling 5GHz band
If you notice that your 5GHz band is not showing. You will need to do the following steps.
- Using your web browser, navigate to the TomatoUSB web administration page of your ASUS RT-AC66U.
- Navigate to Administration –> Configuration.
- Under the “Restore Default Configuration” option, select “Erase all data in NVRAM (thorough)” and click Ok.
The router should reboot. - Once the router has finished rebooting, navigate to the TomatoUSB web administration page.
- Through the TomatoUSB web administration page, reboot the router using the “Reboot…” function.
The router should reboot. - Once the router has finish rebooting, the status page should reflect the 5GHz wireless band.
Congratulations. Your ASUS RT-AC66U is installed with the latest TomatoUSB (Shibby) firmware.