Synology DS412+ – Repairing a Degraded Volume
")
The Synology DS412+ started beeping on the one of the nights when I just got back from work. At first I thought my neighbour’s appliances/alarm clock was beeping and disregarded it. When I walked past the Synology DS412+, I realised one of the disk’s status LED was not lit. Is the disk down?
I started to worry for the data on the Synology Hybrid RAID Volume. Quickly fired up my browser, accessed the DSM and checked the Storage Manager. I was right, disk 2 has failed and no more information was provided.
So how do one recover from degraded RAID volume on the Synology DS412+ on Synology Hybrid RAID (SHR)? It turns out to be 3 simple steps:
- Turning off the warning beep
- Replacing the failed hard disk drive (hot-swappable)
- Repairing the RAID volume
Turning off the warning beep
| Updates | |
| 31st March 2017 | The beep control can now be found under Control Panel > Hardware & Power. |
I guess this step is really optional if you do not find the every 2 seconds beep irritating. For me, I prefer to turn it off after knowing what went wrong with the volume. Turn off the warning beep by:
- Navigating to the DSM page (your Synology NAS’s IP address) using a desktop web browser. The mobile DSM does not give you an option to turn off the beep
- Login to the DiskStation Manager (DSM)
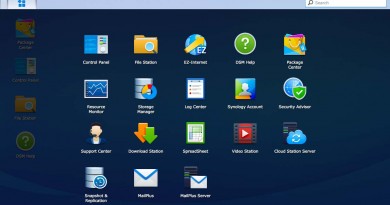
You should be shown the DSM desktop - From the “Start” menu, launch Storage Manager
Storage Manager should launch - In the Storage Manager, select the Volume tab
- In the Volume tab, click on the “Beep off” button
The warning beep should stop and the “Beep off” button will be grey-ed off
With the warning beep off, it is time to replace the faulty hard drive.
Replacing the failed/faulty hard disk drive
You should always replace the failed/faulty hard disk drive with one of similar specifications. It can be larger in size but not smaller as it will affect the size of the total RAID volume. To find out the available size of a RAID volume, use the Synology RAID calculator.
For the replacement hard disk, you can either:
- Get a brand new one and switch place with the faulty disk; or
- Extract the fault disk, send it for warranty replacement and wait the replacement
Do note that if you are going for option 2 of waiting for replacement, do note that you do not enjoy data protection. If any of the remaining disks fail, you will lose your data.
The physical replacement of the hard drive is quite straight forward, you can eject the drive when the Synology NAS is still up and running (if it is hot-swappable) or you can do it when the Synology NAS is powered down.
With the new hard drive inserted, the system logs should reflect a newly inserted hard disk. Similarly, the “HDD Management” tab in “Storage Manager” should reflect the newly added hard disk. Once the new hard disk has been reflected, proceed to the next section.
Repairing the volume
This is the most time consuming part of the entire process as the DSM will be rebuilding the newly inserted hard disk. It all depends on the size of the volume, the bigger it is, the longer the wait.
- Login to the DiskStation Manager (DSM)
- From the “Start” menu, launch Storage Manager
Storage Manager should launch - In the Storage Manager, select the Volume tab
")
The Volume tab in Storage Manager - In the Volume tab, click on the Manage button
A Volume Manager Wizard should launch
Repairing the volume after replacing Disk 2 with a new one - In the Volume Manager, select the Repair option and click on the Next button
- Select the newly inserted hard disk and proceed by clicking the Next button
A warning prompt highlighting that “all the data in the new disk will be erase” should be prompted
Choosing the disk to be rebuilt based on the volume information on the remaining disks - Acknowledge the warning prompt by clicking the Ok button

Ensuring that you have selected the correct disk and you know what you are doing - Once you have confirm the settings for the repair, click on the Apply button
Confirmation of settings. Repairing the volume with the replaced Disk 2. - If done correctly, you should see that Volume 1 is back to 4 disks and the status of the volume should be reflected as “Repairing”.
After the root and swap volume has been restored, the DS412+ proceeds with the parity consistency check. - Congratulations! You have kick started the repair process. In the mean time, the volume will still be accessible, albeit a little slower due to the repair process.


Conclusion
The Synology DS412+ successfully rebuilt the new disk with the necessary information. The RAID volume is up and running with data protection of 1 disk fault-tolerant again!
This is very important as I had use other NAS which had problems rebuilding the RAID volume. Some even formatted the data drive instead of the new disk, worsening the problem further.
I am glad that the DiskStation Manager knows what it is doing and the repair process is easy without needing the end user know all those Linux commands. This is how a good product should be!